
 Vipin PG
Google Authenticator doesn’t move your accounts automatically when you switch phones. If you set up a new device without transferring first, the app opens empty and every account protected by it becomes hard to access. The transfer feature solves this by letting your old phone generate a QR code that your new phone scans to pull in every saved account at once. Here’s exactly how to do it.
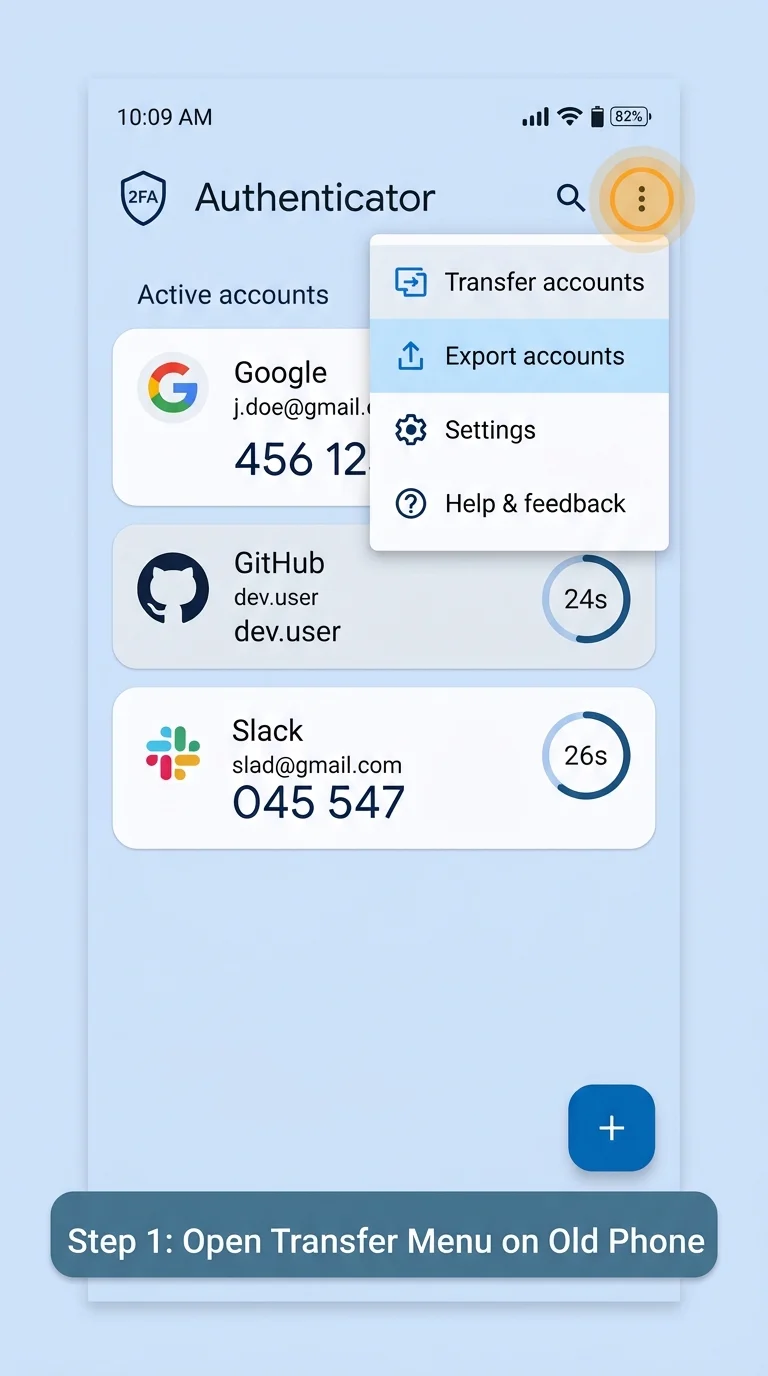
Step 1: Open the Transfer Menu on Your Old Phone
Open Google Authenticator on the phone you’re moving away from. Tap the three-dot menu (or your profile icon) in the top-right corner, then choose Transfer accounts, followed by Export accounts. Don’t uninstall the app or reset this phone yet — the transfer depends on it staying active.
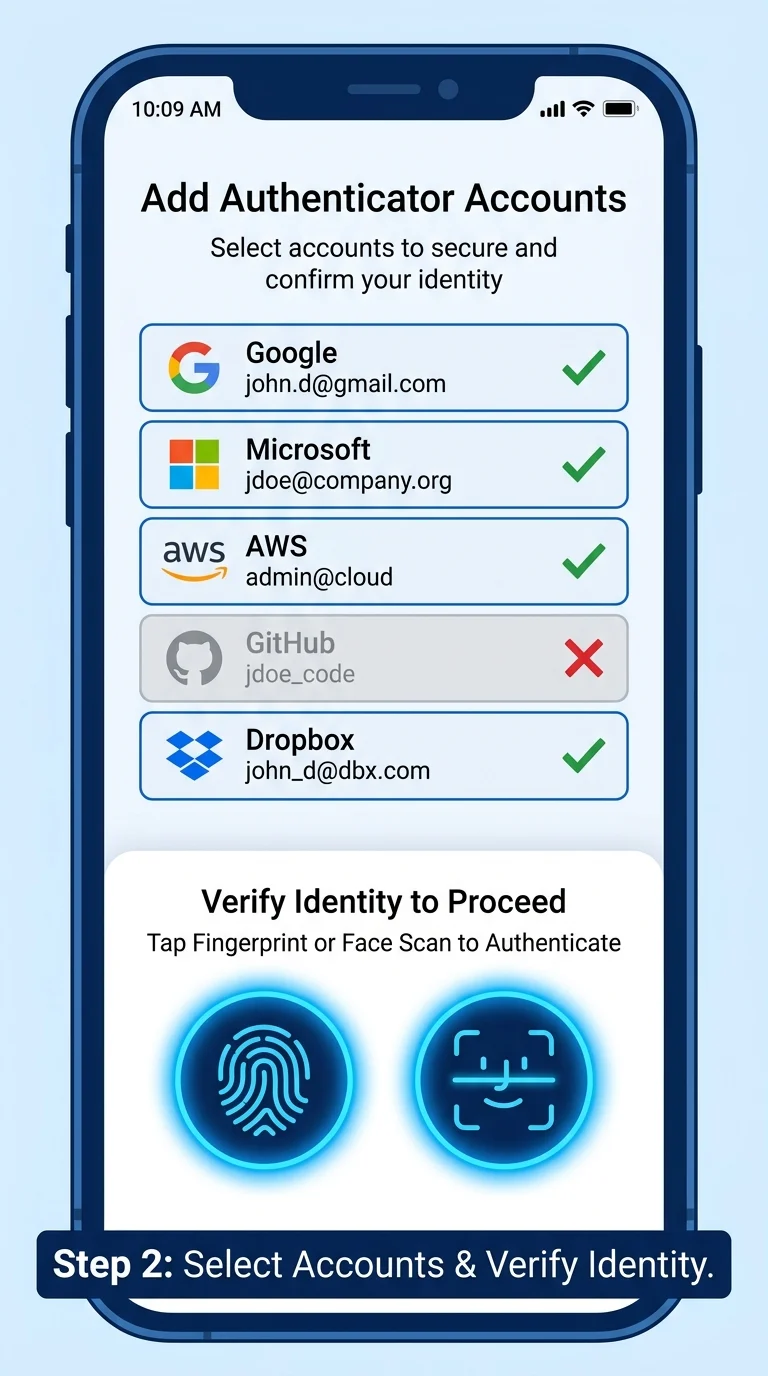
Step 2: Select Accounts and Verify Your Identity
You’ll see a list of all accounts currently stored in the app. Leave selected any accounts you want to move, and deselect any you don’t need on the new phone. Some devices will ask you to confirm your identity with a PIN, fingerprint, or face scan before continuing — this is just a security check, not an error.
Step 3: Generate the QR Code
After confirming your identity, tap Next. The app displays a QR code (sometimes split into two if you have many accounts) on your old phone’s screen. This code holds the transfer data and is only readable by the Authenticator app itself.

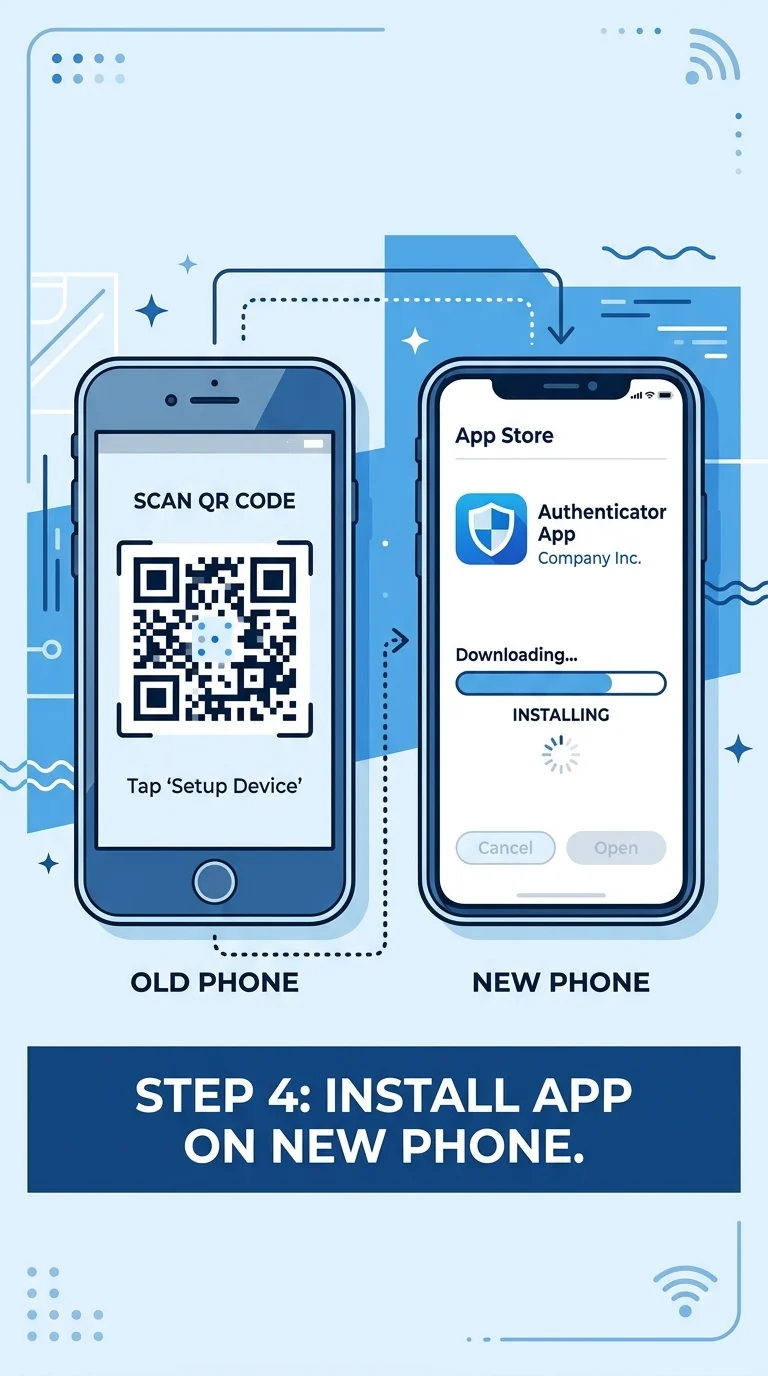
Step 4: Install Google Authenticator on Your New Phone
On your new phone, download Google Authenticator from the Play Store (Android) or the App Store (iPhone) if it isn’t already installed. Open it and keep the old phone nearby with the QR code still on screen.
Step 5: Scan the QR Code on Your New Phone
On the new phone, open Google Authenticator and choose Import existing accounts, then Scan QR code. Point the camera at the QR code shown on your old phone until it scans. If your accounts were split across two codes, repeat this for the second one.

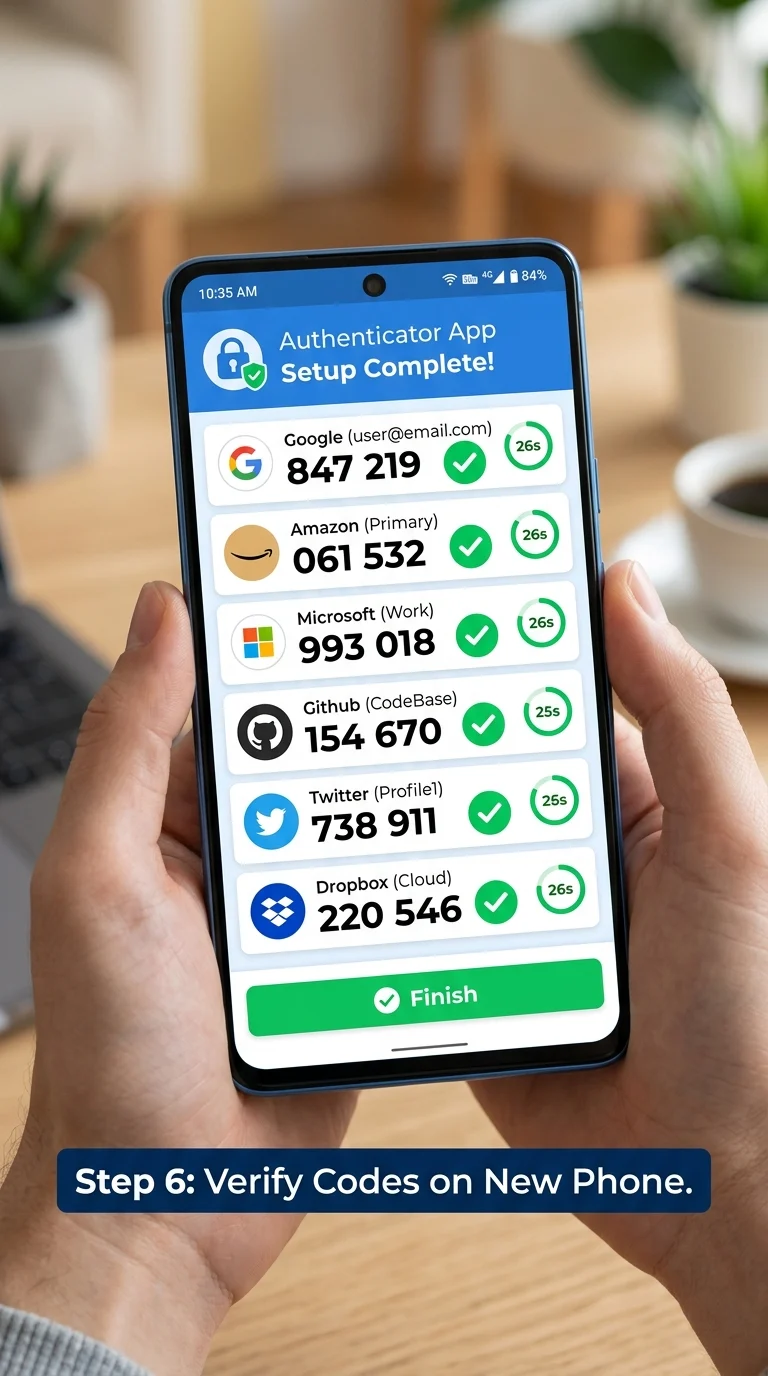
Step 6: Confirm the Codes Work Before Letting Go of Your Old Phone
Once the scan completes, your accounts should appear on the new phone with active six-digit codes. Log into two or three of those accounts to confirm the codes match and work correctly. Only after this confirmation should you remove the accounts from your old phone or reset it.
Conclusion
Transferring Google Authenticator only takes a few minutes once you know where the option lives — the entire process depends on exporting from your old phone before it’s wiped or replaced. Following these six steps in order keeps every account accessible and avoids the lockouts that come from skipping the transfer altogether.