
If you’ve right-clicked a notebook in OneNote looking for a “Delete” option and only found “Close This Notebook,” you haven’t missed anything — that option genuinely doesn’t exist inside the app. Every OneNote notebook is actually a folder stored on OneDrive, and OneNote is just showing you a synced view of it. So to delete a notebook, you have to go to where it’s actually stored: OneDrive. The steps below work exactly the same no matter which device you’re on, because the deletion always happens on OneDrive’s side.
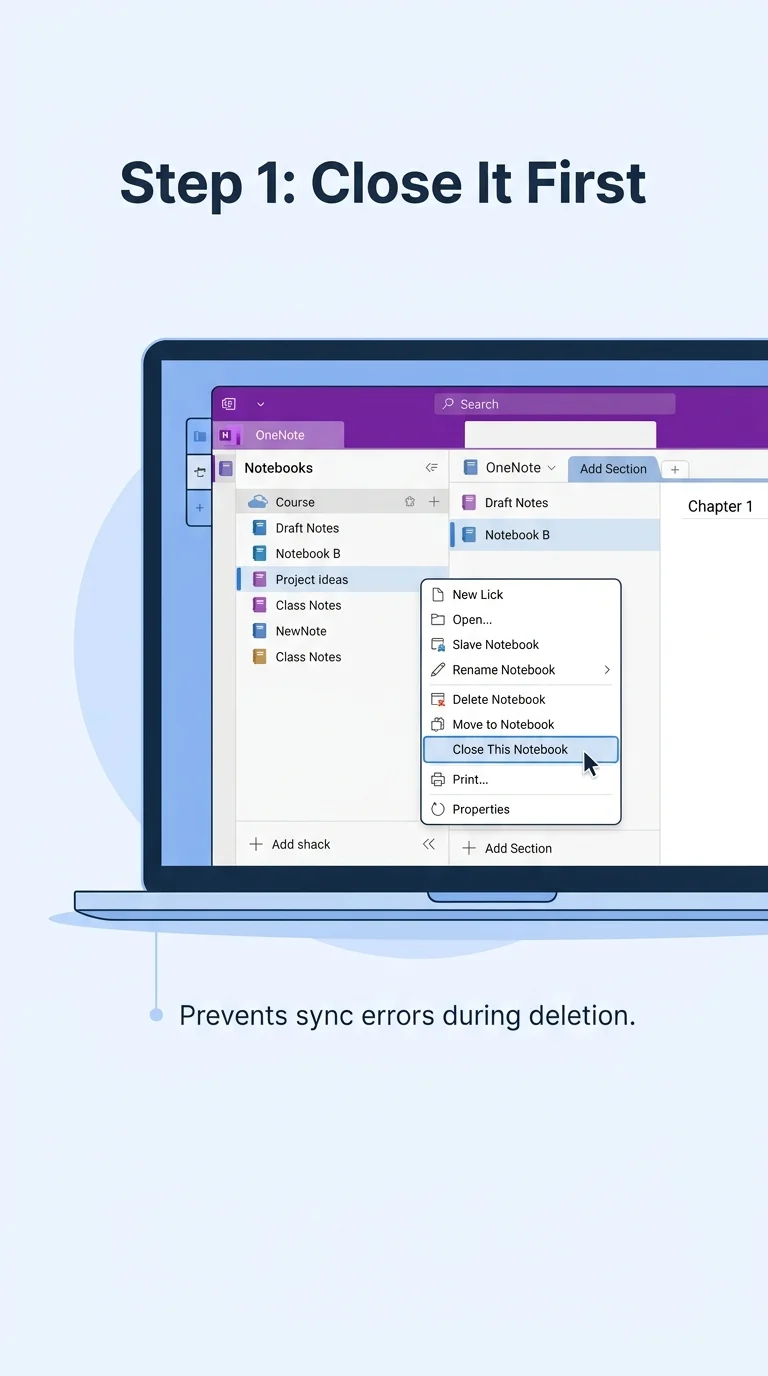
Step 1: Close the Notebook in OneNote First
Before deleting anything, close the notebook in OneNote itself. On Windows or Mac, right-click the notebook name in the sidebar and select Close This Notebook. On iPhone, iPad, or Android, tap and hold the notebook and choose Close. This isn’t strictly required, but skipping it can cause OneNote to throw sync errors afterward, since it will keep trying to reach a notebook that no longer exists.
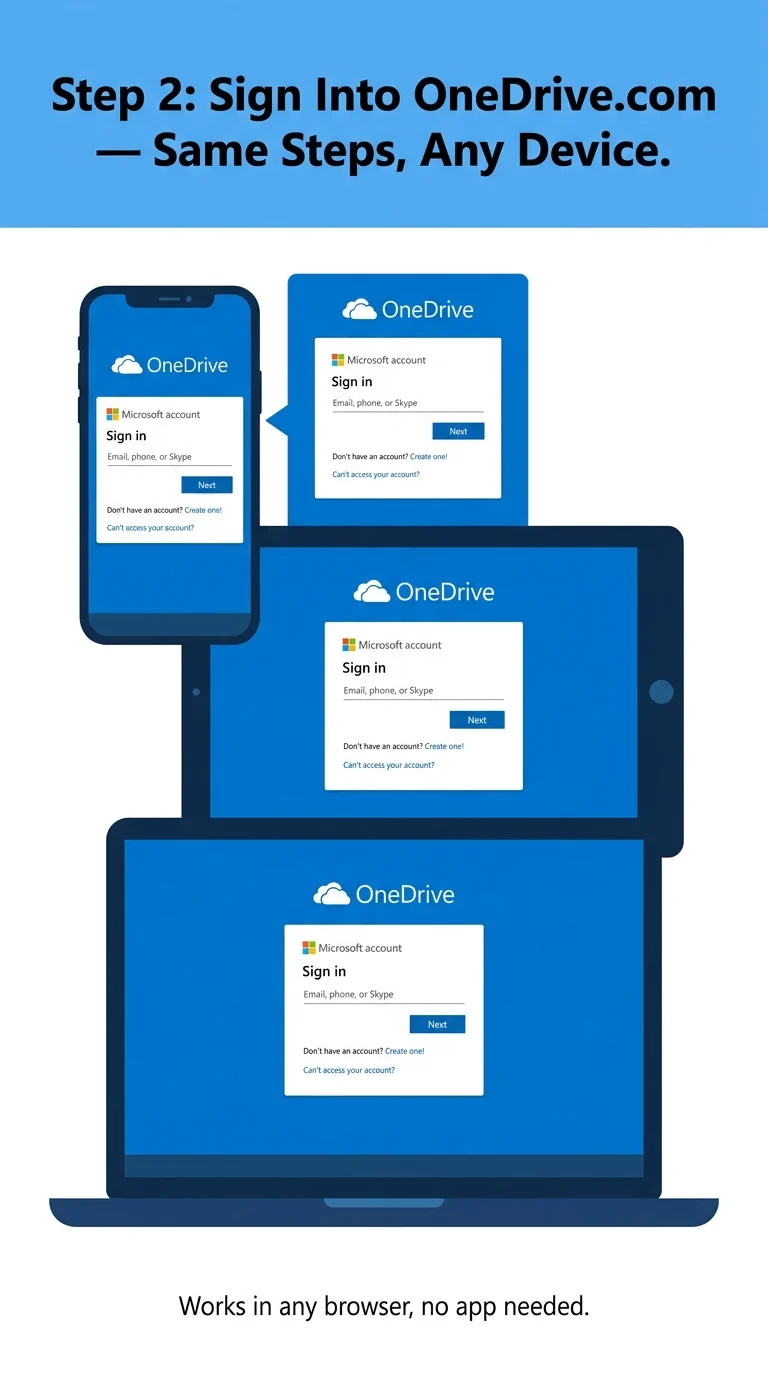
Step 2: Open OneDrive in a Browser
Go to onedrive.com in any browser and sign in with the same Microsoft account you use in OneNote. This step is identical whether you’re on a phone, tablet, or computer — you don’t need a separate OneDrive app, just a browser.
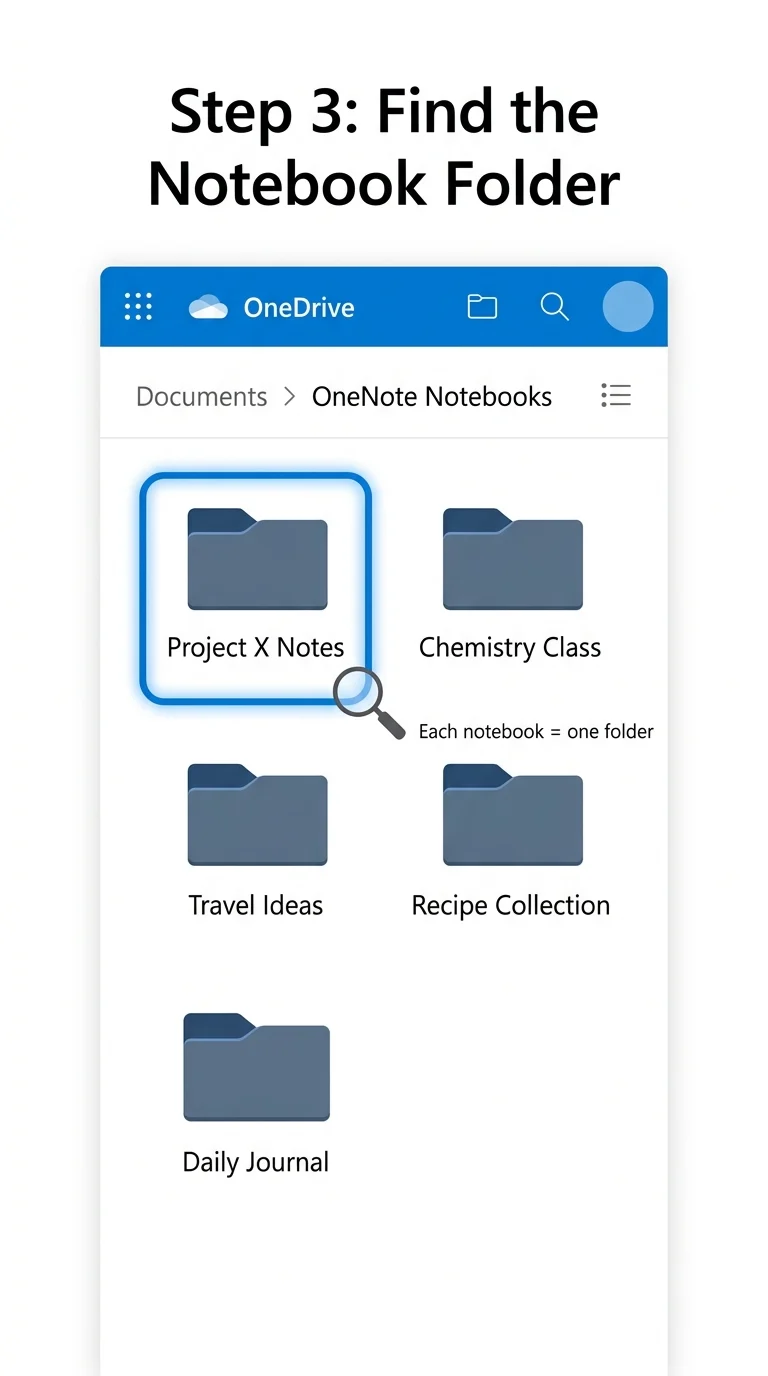
Step 3: Find the Notebook’s Folder
Inside OneDrive, navigate to Documents > OneNote Notebooks (on some accounts it may just be a folder called “Notebooks”). Each notebook you’ve ever created shows up here as its own individual folder, named exactly what you called it in OneNote.
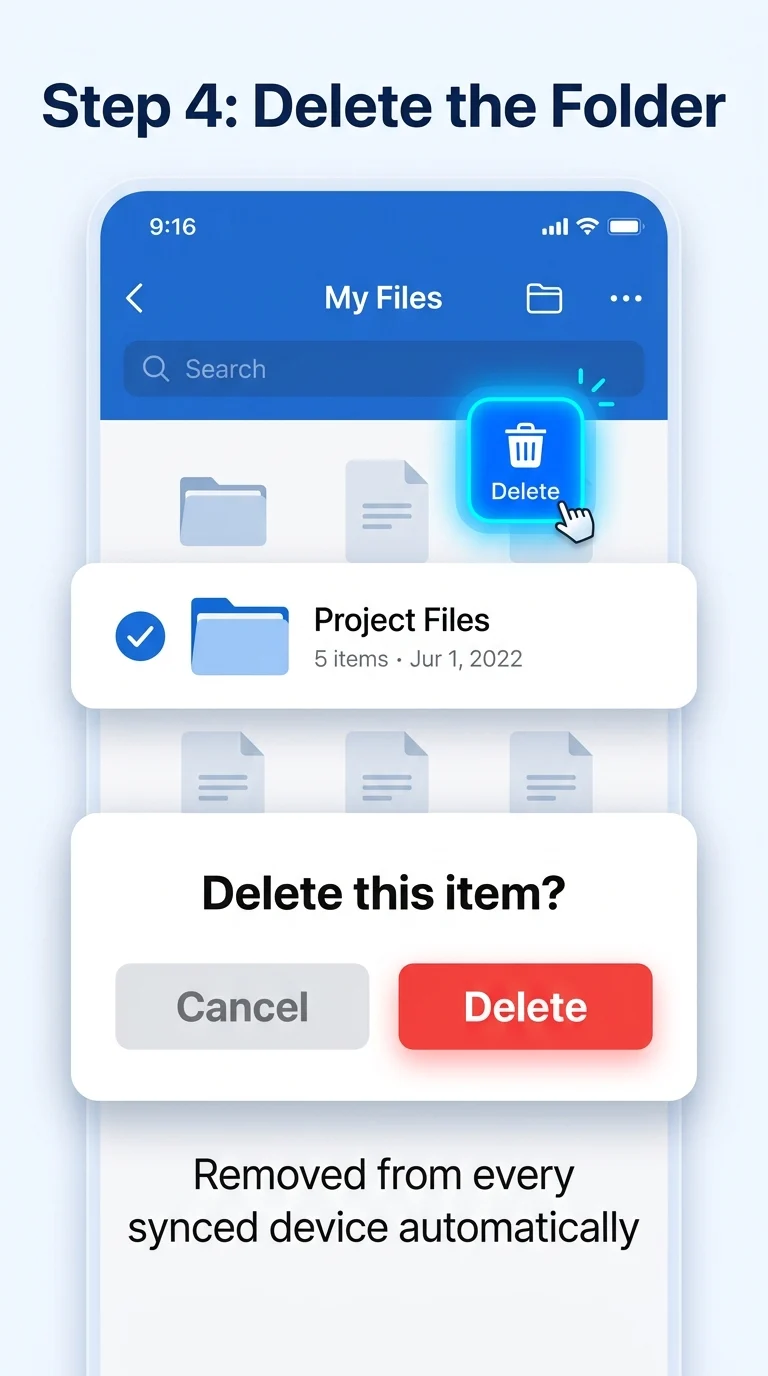
Step 4: Delete the Notebook
Select the notebook’s folder, then click Delete from the toolbar, or right-click it and choose Delete from the menu (on mobile, tap the three-dot menu next to the folder). Confirm the deletion when prompted. The notebook is removed from OneDrive immediately, and within a short sync cycle it disappears from OneNote on every device signed into that account.
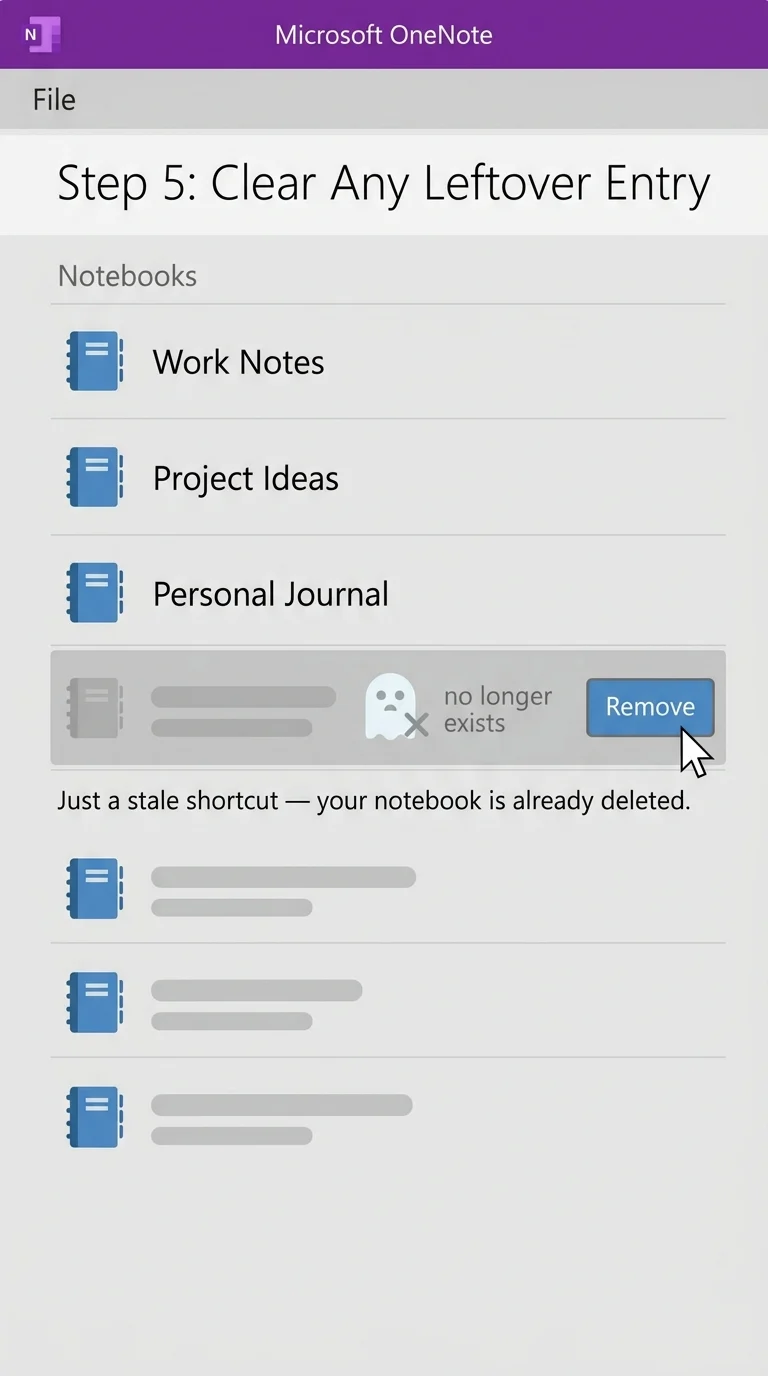
Step 5: Clear the Leftover Notebook From OneNote’s Sidebar
Sometimes a deleted notebook lingers in OneNote’s list for a while after you delete it from OneDrive. If that happens, open OneNote, go to File > Info (Windows) or your notebook list, find the leftover entry, and remove or close it manually. This just clears the stale shortcut — the actual notebook and its content are already gone.
Changed your mind? Deleted notebooks sit in your OneDrive Recycle Bin for about 30 days. Go to OneDrive, open the Recycle Bin from the sidebar, find the notebook, and select Restore to bring it back exactly where it was.
Note for Windows users: if a notebook was saved only to your computer rather than OneDrive, delete it instead through File Explorer at Documents > OneNote Notebooks, right-click the notebook, and choose Delete. That’s a separate, simpler case from the OneDrive method above.
Why This Works the Same on Every Device
The reason this method is device-agnostic isn’t a coincidence — it’s because OneNote never actually stores your notebooks locally in a way the app controls. Windows, Mac, iPhone, Android, and the web app are all just different windows into the same OneDrive folder. Once you delete the folder there, every version of OneNote you use simply stops finding it. That’s the whole answer to deleting a notebook in OneNote, regardless of which device you started from.