
 Vipin PG
FaceTime lets you capture a Live Photo — a few seconds of video and audio — during a call, so you can save a moment without recording the whole conversation. But the feature is tucked away in settings, and the on-screen shutter button only shows up under the right conditions. Here’s exactly how to turn it on and what to check if it’s missing.
Step 1: Enable Live Photos on iPhone or iPad
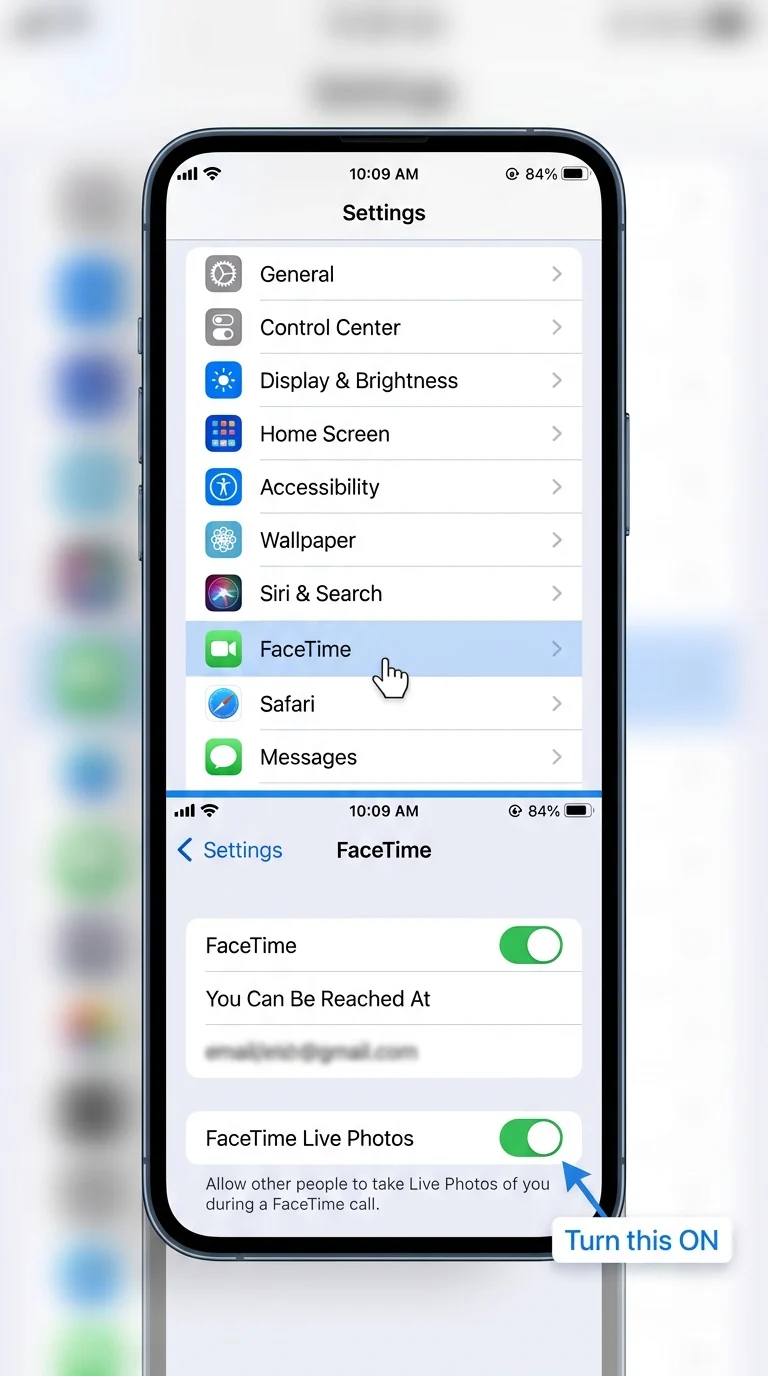
Open the Settings app and look for FaceTime. On newer versions of iOS, this has moved slightly — it’s under Settings → Apps → FaceTime instead of sitting directly in the main Settings list. Once you’re on the FaceTime settings page, find the toggle labeled “FaceTime Live Photos” and switch it on. This setting is on by default, so if you’ve never touched it, it’s likely already enabled — but it’s worth checking, especially if you’ve reset your device or updated iOS recently.
Step 2: Enable Live Photos on Mac
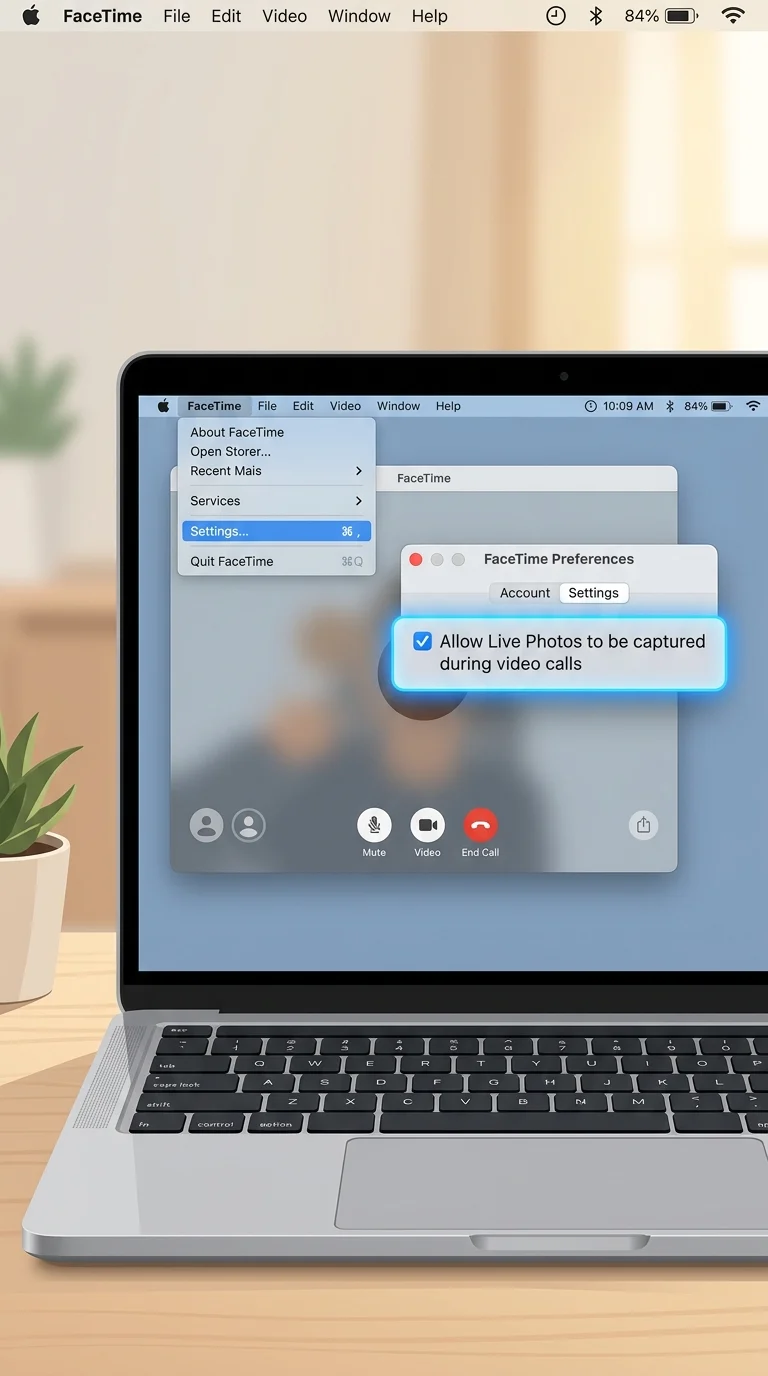
On a Mac, the setting lives inside the FaceTime app itself rather than System Settings. Open FaceTime, then click FaceTime in the menu bar at the top of the screen and choose Settings (this may say Preferences on older macOS versions). Look for the checkbox that allows Live Photos to be captured during video calls and make sure it’s ticked. Note that this option can’t be changed once a call has already started, so it needs to be set up beforehand.
Step 3: Use the Shutter Button During a Call
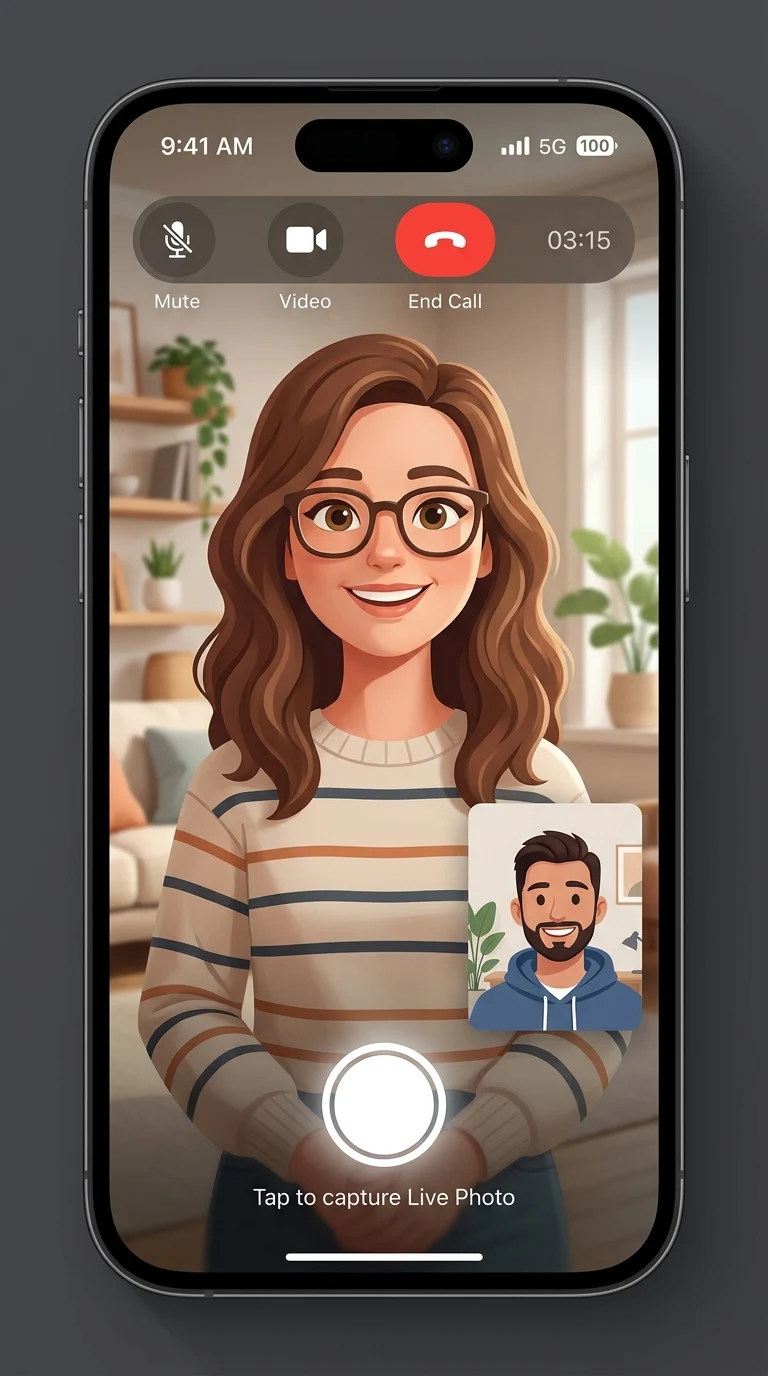
Once the setting is on for both people on the call, start your FaceTime video call as usual. If you don’t immediately see any on-screen buttons, tap the screen (or move your cursor, on Mac) to bring up the call controls. You’ll see a white shutter button, styled as two white circles, one inside the other. Tap it to capture a Live Photo. On a group call, tap the tile of the specific person you want to photograph first, then tap the shutter button. Both people on the call will get a notification that a photo was taken — there’s no way to disable that notification.
Step 4: What to Check if the Shutter Button Is Missing
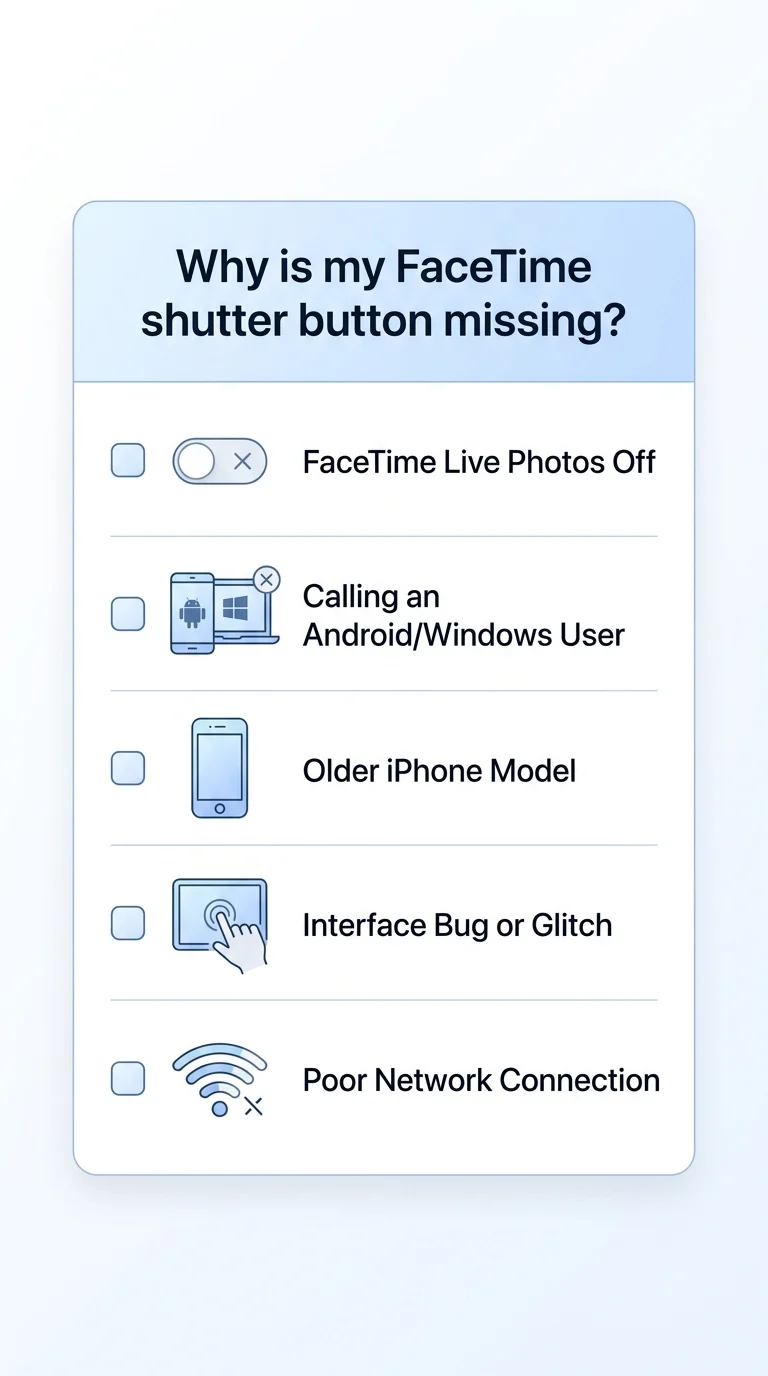
If you’ve enabled the setting but still don’t see the shutter button, run through this checklist:
- The other person has it turned off. Both sides of the call need Live Photos enabled — it won’t work if only one person has the toggle on.
- Someone’s on an unsupported device. This feature only works between Apple devices running iOS 11 or later (or the equivalent macOS version). If someone joins via a FaceTime web link on Android or Windows, Live Photos won’t be available for that call.
- Your device is older or outdated. Live Photos requires iPhone 6s or later, and keeping iOS updated avoids bugs tied to this feature.
- The controls aren’t visible. Tap the screen once — the shutter button is part of the call controls, which auto-hide after a few seconds of inactivity.
- Storage or connection issues. Low device storage or an unstable connection can occasionally prevent the photo from capturing properly.
Conclusion
Turning on FaceTime Live Photos takes one toggle on each device, but it only works when both people on the call have it enabled and are using supported Apple hardware. If the shutter button doesn’t show up, it’s almost always one of those conditions rather than a bug — working through the checklist above will usually get it back.