
 Vipin PG
If you’ve ever deleted a page break in Word and watched your document rearrange itself in ways you didn’t ask for, you’re not imagining it. Page breaks in Word aren’t just “empty space” you can remove without consequence , they’re tied into how Word decides where content flows, and sometimes what looks like a page break is actually something else entirely. That mismatch is where most formatting headaches come from.
Why deleting a page break isn’t always as simple as it sounds
Word actually has three different things that can look like a page break to the average user, and each one behaves differently when you try to remove it: Manual page breaks are the ones you insert yourself, usually with Ctrl+Enter or through the Insert menu. These are the easiest to deal with , they’re a literal character in the document, and deleting that character removes the break cleanly, the same way deleting a letter removes a letter. Section breaks look almost identical when formatting marks are visible, but they’re a completely different object. They don’t just push content to a new page , they can also carry their own header, footer, page numbering, and column settings. Delete one without realizing what it is, and you might suddenly lose a header style or watch your page numbers reset unexpectedly. Style-driven breaks are the sneaky ones. These happen when a heading or paragraph style has “Page break before” switched on in its formatting rules. There’s no visible break character to delete at all , the paragraph itself is programmed to always start a new page. You can delete and delete and the break will keep coming back, because you’re not actually removing the thing causing it. Knowing which of these three you’re dealing with before you start deleting is really the whole trick.
Step one: make Word show you what’s actually there
Turn on formatting marks first, always. On desktop and in Word Online, this is under the Home tab , look for the ¶ symbol in the Paragraph group, or use the shortcut Ctrl+Shift+8 on Windows (Cmd+8 on Mac). This reveals every hidden structural element in your document: paragraph marks, spaces, tabs, and importantly, breaks. Once it’s on, a manual page break shows up as a thin dotted line with the words “Page Break” sitting in the middle of it. A section break looks similar but uses a slightly heavier double line and will say something like “Section Break (Next Page)” or “Section Break (Continuous).” If you don’t see either of these anywhere near where the page split happens, you’re almost certainly dealing with a style-driven break, and deleting characters won’t help you.
Removing a manual page break
This is the straightforward case. Click your cursor immediately in front of the dotted “Page Break” line, then press Delete , not Backspace. The distinction matters more than people think: Backspace deletes whatever is immediately behind your cursor, which after clicking before a break could end up pulling in the last line of the previous page instead of removing the break itself. Delete, pressed from just before the break, removes the break character cleanly and merges the two pages back together. If you’re on Word Online, the process is identical , same ribbon, same icon, same shortcut. Microsoft has kept the web version’s core editing behavior consistent with desktop, so there’s no real learning curve switching between the two. Mobile is the outlier. The iOS and Android Word apps don’t show formatting marks the way desktop does, so you can’t visually target the break the same way. In practice, the most reliable method on mobile is to place your cursor at the start of the first line on the new page and press Backspace once , carefully, checking the result before doing it again if needed. If you’re doing a lot of formatting cleanup, it’s genuinely easier to do it on desktop or web and just let the change sync over.
What to check if the layout still looks wrong afterward
Sometimes deleting the break works, but the page still doesn’t look right , extra gaps, uneven spacing, a heading that’s oddly isolated. This almost always traces back to paragraph-level settings rather than the break itself. Click into the paragraph or heading in question, open Paragraph settings, and go to the “Line and Page Breaks” tab. Two settings cause most of the confusion here: “Page break before” forces that specific paragraph to always start on a new page, independent of any manual break. This is common in heading styles , Word’s built-in Heading 1 style, for example, sometimes has this switched on depending on the template you started from. If a heading keeps forcing a new page no matter what you delete, this checkbox is almost certainly why. “Keep with next” and “Widow/Orphan control” can also shift where lines land near a page boundary, which can look like a break is still there even after you’ve removed it. Turning these off (or on, depending on what you’re trying to achieve) often resolves layout oddities that seem to persist for no reason. 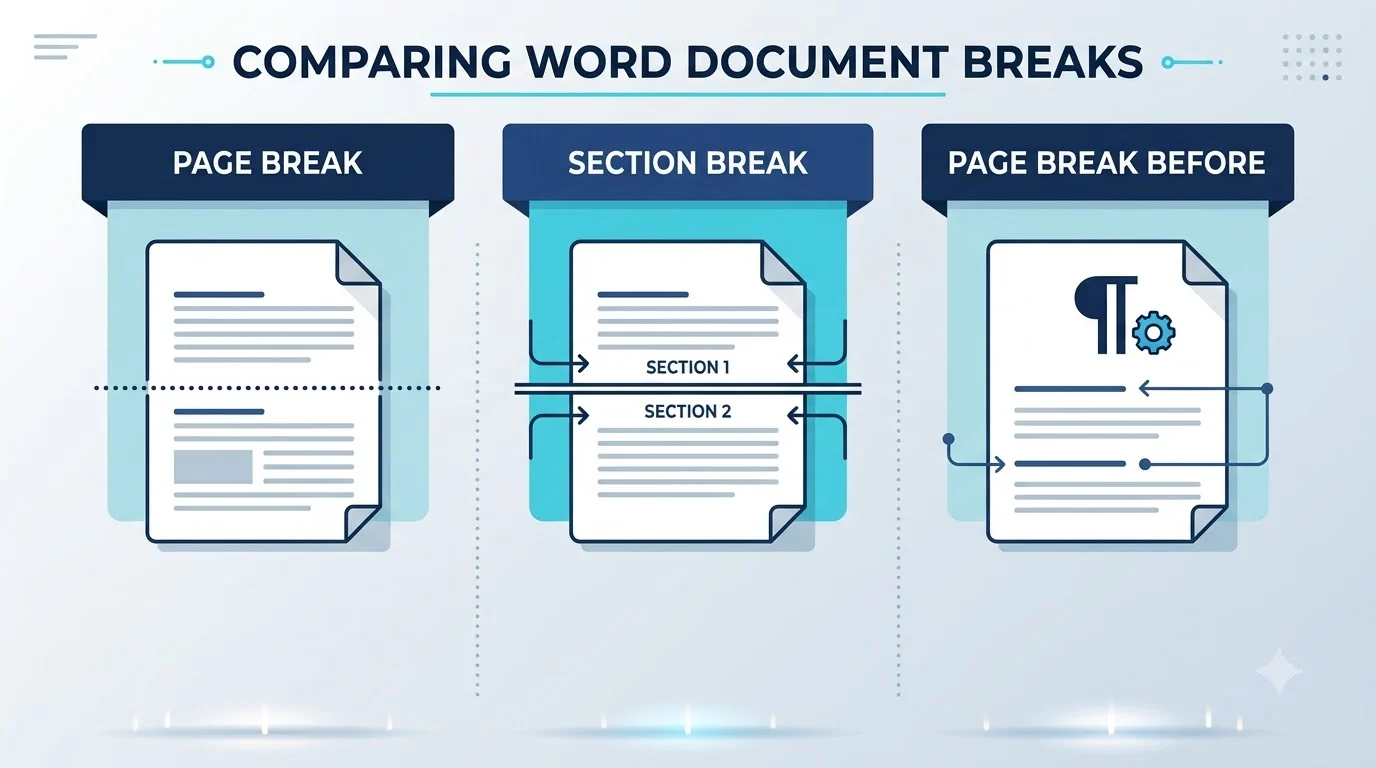
Clearing out several page breaks at once
If you’ve inherited a long document with page breaks scattered throughout , common with reports that have been copy-pasted together from multiple sources , going through them one by one is tedious. Word’s Find and Replace tool handles this in a few clicks. Open it with Ctrl+H, click “More” to expand the options, then “Special,” and choose “Manual Page Break” from the list. This inserts a special code (^m) into the Find field automatically. Leave the Replace field empty and click Replace All. Word will strip out every manual page break in the document in one pass, without touching any section breaks, which keeps your headers, footers, and page numbering intact.
The section break exception
It’s worth repeating: don’t apply the same “just delete it” logic to section breaks without thinking first. Because they often control formatting for the section that follows , headers, footers, orientation, columns, page numbering , removing one can quietly undo formatting elsewhere in the document that you didn’t mean to touch. If you’re not sure whether something is a section break or a page break, check the label that appears on the dotted line when formatting marks are on before deleting anything.
Why the break might keep coming back
If you’ve deleted what looked like the break and it reappears the moment you scroll away, the cause is almost always a style rule, not a leftover character. Right-click the relevant style in the Styles pane (usually visible under the Home tab), choose “Modify,” and check the Format menu for Paragraph settings there. Fixing “Page break before” at the style level, rather than on the individual paragraph, stops it from happening every time that style is used anywhere else in the document , which matters if you’ve got the same heading style applied a dozen times. This is also the setting worth adjusting proactively if you’re formatting a long document from scratch and want predictable control over exactly where pages break, rather than letting Word decide based on style defaults.
The takeaway
Most “why won’t this page break delete” problems aren’t really about deleting , they’re about correctly identifying what you’re looking at first. A visible dotted line responds to Delete. A double line is a section break and deserves a second thought before removal. And no visible line at all, with a break that keeps returning, means the fix lives in Paragraph or Style settings rather than anywhere near your cursor. Once you know which of the three you’re dealing with, the actual fix takes about five seconds.