 Vipin PG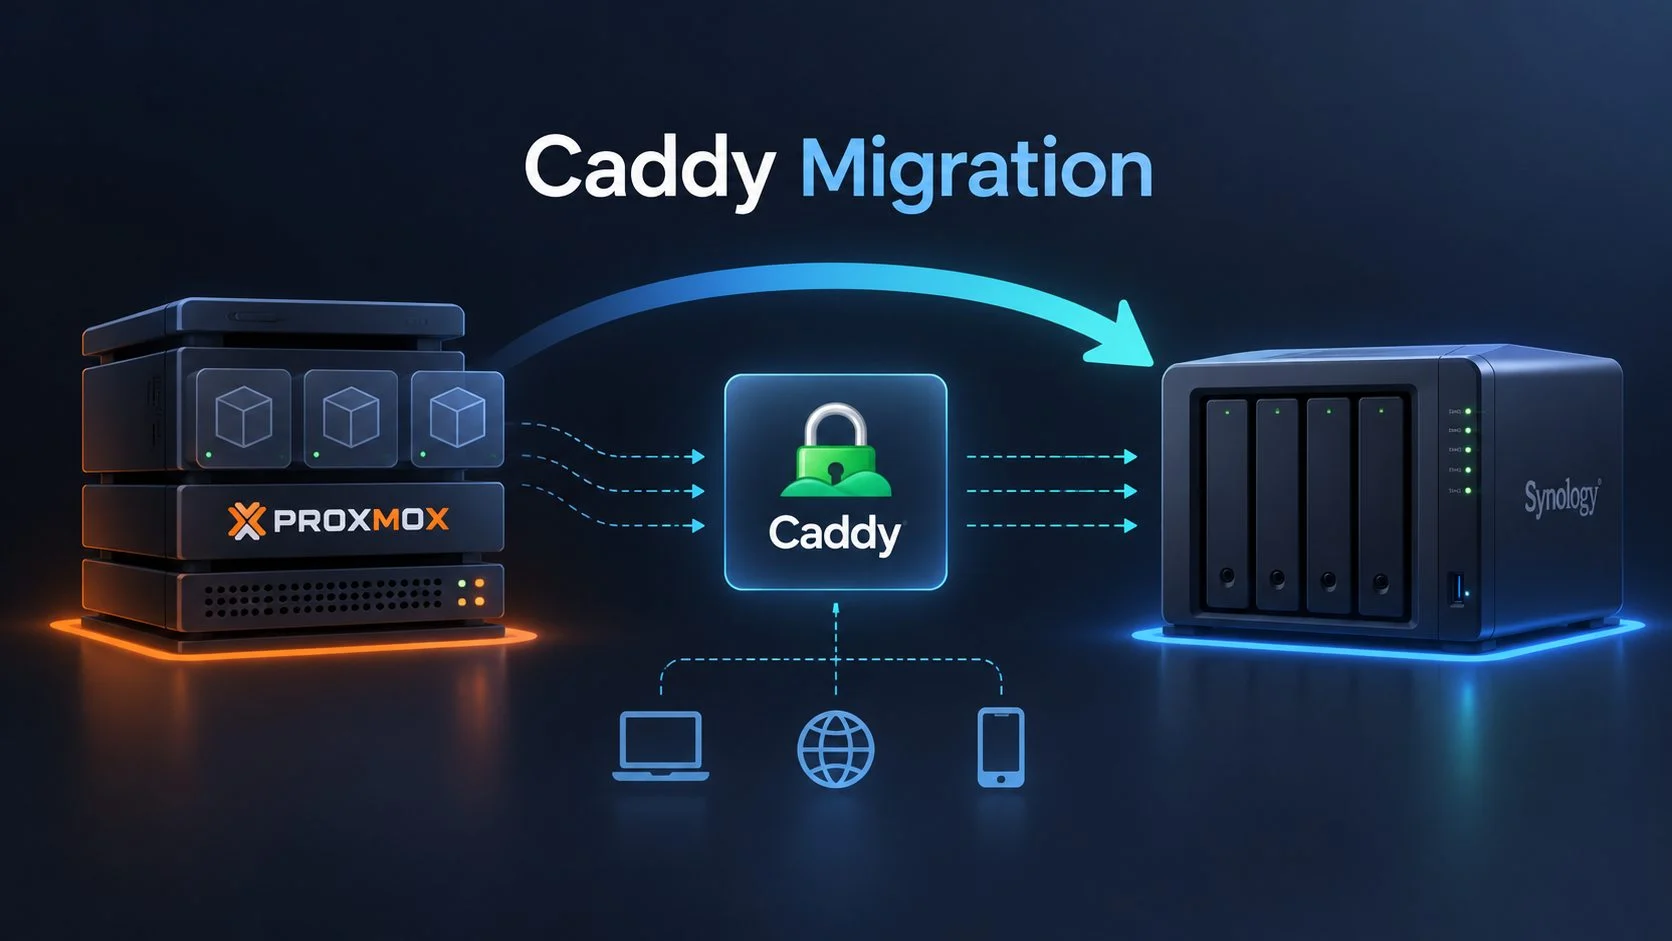
A reverse proxy makes a homelab easier to use. Instead of keeping track of an IP address and port for every service, you can reach them through memorable hostnames and a shared HTTPS entry point. Caddy is a popular choice because it combines reverse proxying with automatic certificate management and a readable configuration format.
Where Caddy runs matters, though. If it is hosted in a Proxmox VM or LXC container, maintenance or a reboot of the Proxmox server also takes the proxy offline. Services on other machines may still be running, but their usual hostnames stop working.
Moving Caddy to a Synology NAS can separate the proxy from the virtualization host. This guide walks through the migration, including the Caddyfile, persistent data, local HTTPS certificates, DNS cutover, and post-migration checks. The deployment example uses Docker Compose on Synology. If your current Caddy installation uses another method, the same migration principles apply, but file paths and service commands will differ.
Why move Caddy from Proxmox to a Synology NAS?
A typical homelab spreads services across virtual machines, containers, and physical devices. These might include the Proxmox interface, NAS dashboards, development tools, automation and AI dashboards, monitoring services, and other applications.
Without a reverse proxy, each service may require its own IP address and port:
https://192.168.10.20:8006
http://192.168.10.30:6768
http://192.168.10.40:8080
Caddy lets you use hostnames instead:
https://proxmox.example.test
https://automation.example.test
https://dashboard.example.test
When Caddy runs on Proxmox, every hostname routed through it depends on both the Proxmox host and the VM or container running Caddy. If Proxmox needs to restart, a NAS dashboard may still be available at its direct IP address, but its usual hostname will fail until the proxy comes back.
A NAS that runs independently of the virtualization server can host the shared proxy for services on the NAS, Proxmox, and other machines. On compatible models, Synology Container Manager provides a way to deploy Caddy with persistent configuration and data. Proxmox maintenance can then happen without automatically interrupting access to services hosted elsewhere.
This does not provide high availability. The proxy now depends on the NAS instead of Proxmox, so it will be unavailable if the NAS is offline. For a single-NAS homelab, the move can still make routine maintenance easier.
Understand the migration architecture
Before changing anything, map the traffic flow. The backend applications do not need to move. The system that receives and routes HTTPS requests is the part being replaced.
Before migration
                 LAN CLIENTS
                     |
                LOCAL DNS
                     |
                     v
             PROXMOX SERVER
              VM / CONTAINER
                     |
                  CADDY
                     |
          +----------+----------+
          |          |          |
          v          v          v
       Proxmox      NAS      Other Apps
        Web UI    Services   and Servers
After migration
                 LAN CLIENTS
                     |
                LOCAL DNS
                     |
                     v
               SYNOLOGY NAS
                     |
                 CADDY
              Docker Container
                     |
          +----------+----------+
          |          |          |
          v          v          v
       Proxmox      NAS      Other Apps
        Web UI    Services   and Servers
With a careful cutover, the application hostnames can stay the same while the proxy’s address changes.
Prerequisites
Before you begin, make sure you have:
- A Synology NAS that supports Container Manager or a compatible Docker installation.
- Administrator access to Synology DSM and SSH access to the NAS.
- The current Caddyfile and access to the old Caddy data directory, especially if you need to preserve the internal certificate authority.
- Access to the local DNS service.
- A backup of the current configuration and certificate data.
- Permission to configure container networking and persistent storage.
The examples use Docker Compose. Check whether Docker and the Compose plugin are available on your NAS:
sudo docker --version
sudo docker compose version
If the Compose plugin is unavailable, use the project interface in Synology Container Manager or install a compatible Compose implementation. Adapt the commands to your NAS model, DSM version, and Docker installation.
1. Inspect the existing Caddy installation
First identify how Caddy runs on Proxmox. It may be installed directly in a Linux VM, managed by systemd, running in an LXC container, or deployed as a Docker container inside a VM or LXC container. The deployment method determines how to find and copy its configuration and data.
For a native Linux installation, check the service and binary:
systemctl status caddy
which caddy
For Docker, list containers and inspect the Caddy container’s volume mounts:
docker ps -a
docker inspect caddy \
  --format '{{json .Mounts}}'
Replace caddy with the actual container name.
Two parts of the deployment are especially important:
- Caddyfile: Contains hostnames, reverse proxy rules, HTTPS directives, and other server configuration.
- Caddy data directory: Holds managed certificates, private keys, internal certificate authority files, and other operational data.
For a standard native Linux service, common paths are:
/etc/caddy/Caddyfile
/var/lib/caddy/.local/share/caddy/
For the official Docker image, the usual paths inside the container are:
/etc/caddy/
/data/
/config/
These paths can differ when an installation uses custom environment variables, service configuration, or Docker volume mappings. Confirm the actual paths before copying anything.
2. Back up the original configuration
Back up the Caddyfile and the complete Caddy data directory before changing the active proxy. For a conventional Linux installation, copy the Caddyfile with:
sudo cp /etc/caddy/Caddyfile \
  /etc/caddy/Caddyfile.backup
Preserve the data directory as well, particularly if the configuration uses Caddy’s internal certificate authority. It is not disposable cache: it contains information used to manage certificates and maintain the identity of that authority. If Caddy runs in Docker, back up the source volumes or their underlying directories.
Protect the backup. It may contain private keys and other sensitive cryptographic material.
Copying the Caddyfile transfers routing rules, but it does not necessarily transfer the original certificate authority. If the new installation creates a different internal CA, devices that trusted the old CA will not trust the new one automatically. Preserving the old data directory can avoid having to distribute a new root certificate to every device.
3. Prepare the Synology NAS
Sign in to DSM and confirm that Container Manager is available. SSH access is useful for creating directories, checking ports, and validating the configuration.
This example uses a dedicated directory on a persistent Synology volume:
/volume1/docker/caddy/The directory layout will be:
/volume1/docker/caddy/
├── conf/
│   └── Caddyfile
├── data/
├── config/
└── compose.yaml| Path | Purpose |
|---|---|
conf |
Stores the Caddyfile. |
data |
Stores TLS certificates, CA keys, and persistent data. |
config |
Stores Caddy configuration state. |
compose.yaml |
Defines the Docker deployment. |
Create the directories over SSH:
sudo mkdir -p /volume1/docker/caddy/conf
sudo mkdir -p /volume1/docker/caddy/data
sudo mkdir -p /volume1/docker/caddy/config
The example assumes the shared volume is named volume1. Substitute the correct volume path for your NAS, then make sure the Docker process has access to these directories.
4. Check for port conflicts
Caddy normally needs TCP port 80 for HTTP and TCP port 443 for HTTPS. UDP port 443 is optional and supports HTTP/3. DSM and other applications may already be using one or more of these ports. Docker cannot bind Caddy to an address and port that another process already occupies.
Check active listeners and Docker port mappings over SSH:
sudo ss -lntp | grep -E ':(80|443)\b'
sudo docker ps \
  --format 'table {{.Names}}\t{{.Ports}}'
If a required port is in use, identify the service before making changes. The simplest option is to free the ports Caddy needs, but DSM may rely on existing web services, reverse proxy rules, or application integrations. Do not stop Synology’s system Nginx process, disable DSM services, or overwrite internal system files without understanding the impact. Such changes can interrupt NAS functions and may not survive DSM updates.
Other options include assigning Caddy a dedicated IP with a suitable container network, adjusting a supported service configuration, or using alternate host ports with an appropriate upstream port-forwarding arrangement. A Docker bridge port mapping alone does not give a container its own LAN address. The container must receive or bind to that address, and the LAN must be able to route traffic to it.
The rest of this guide assumes TCP ports 80 and 443 are available to Caddy.
5. Create the Docker Compose configuration
Create /volume1/docker/caddy/compose.yaml with the following content:
services:
  caddy:
    image: caddy:2
    container_name: caddy
    restart: unless-stopped
    ports:
      - "80:80"
      - "443:443"
      - "443:443/udp"
    volumes:
      - ./conf:/etc/caddy:ro
      - ./data:/data
      - ./config:/config
The example uses the official Caddy 2 Docker image. For a controlled deployment, consider pinning a tested image version rather than using a floating tag. The container name makes it easy to identify, and restart: unless-stopped restarts it after Docker restarts unless you explicitly stopped it.
The port mappings expose HTTP and HTTPS on the NAS, with UDP 443 available for HTTP/3. The volume mounts keep the Caddyfile, data, and configuration state outside the container. The configuration mount is read-only; the data and configuration mounts persist across restarts and image updates.
Start the container from the deployment directory:
cd /volume1/docker/caddy
sudo docker compose up -d
Check its status and logs:
sudo docker compose ps
sudo docker compose logs --tail=100 caddy
You can also manage the project through Synology Container Manager. Logs may show configuration or certificate-related messages until the Caddyfile and storage are set up correctly.
6. Migrate the Caddyfile
Copy the Caddyfile from Proxmox to the NAS configuration directory. One option is to transfer it through a machine with SSH access to both systems:
scp user@old-server:/path/to/Caddyfile \
    ./Caddyfile
scp ./Caddyfile \
    nas-user@nas-host:/temporary/Caddyfile
Then move it into the persistent configuration directory from an SSH session on the NAS:
sudo cp /temporary/Caddyfile \
  /volume1/docker/caddy/conf/Caddyfile
Use paths and usernames appropriate to your systems. Synology File Station or another secure file-transfer tool can also transfer the file.
This sanitized example shows several common homelab routes. The .example.test names and 192.0.2.x addresses are placeholders reserved for documentation. Replace them with hostnames resolved by your local DNS service and the actual addresses of your applications. For a new private home-network naming scheme, home.arpa is reserved for residential networks.
proxmox.example.test {
    tls internal
    reverse_proxy https://192.0.2.10:8006 {
        transport http {
            tls_insecure_skip_verify
        }
    }
}
automation.example.test {
    tls internal
    reverse_proxy http://192.0.2.20:6768
}
dashboard.example.test {
    tls internal
    reverse_proxy http://192.0.2.30:8080
}
agents.example.test {
    tls internal
    reverse_proxy http://192.0.2.30:9119
}
nas-app.example.test {
    tls internal
    reverse_proxy http://192.0.2.40:5000
}
In this block, automation.example.test tells Caddy to accept HTTPS requests for that hostname, issue a certificate from its internal CA, and forward matching requests to the backend at port 6768. The client-to-Caddy connection uses HTTPS, while the connection to this backend uses HTTP on the local network. HTTPS on the client-facing side does not encrypt every connection between Caddy and its backends.
Handling the Proxmox HTTPS interface
The Proxmox management interface commonly uses HTTPS on port 8006. Its certificate may be self-signed or issued by an internal CA. The example below disables verification of the upstream certificate:
proxmox.example.test {
    tls internal
    reverse_proxy https://192.0.2.10:8006 {
        transport http {
            tls_insecure_skip_verify
        }
    }
}
This is convenient in a controlled lab, but it means Caddy does not authenticate the upstream server’s certificate. The connection is encrypted, but Caddy cannot verify that it is talking to the expected server.
Where possible, configure Caddy to trust the upstream CA and use the server name on the backend certificate:
proxmox.example.test {
    tls internal
    reverse_proxy https://192.0.2.10:8006 {
        transport http {
            tls_trust_pool file /etc/caddy/upstream-ca.crt
            tls_server_name proxmox.internal.example
        }
    }
}
This configuration requires the CA certificate to be mounted in the container and the backend certificate to match the configured server name. Verify these TLS options against the Caddy version you are running. Verified upstream TLS is preferable for sensitive environments.
7. Transfer Caddy’s existing certificate data
This step matters if the old Caddy setup used tls internal. Caddy’s internal CA issues certificates for local HTTPS sites. Devices that trust that CA can use those sites without certificate warnings.
A fresh Caddy installation may create a new root CA. Browsers and operating systems that trust the old root will reject certificates from the new one until you install and trust the replacement. To preserve CA continuity, copy the old Caddy data directory.
Option A: Preserve the existing CA
- Back up the old Caddy data directory.
- Stop the old Caddy instance before taking the final copy, so the data is consistent.
- Transfer the complete data directory to the NAS.
- Place its contents under the directory mounted as
/datain the new container. - Preserve file permissions and the directory structure.
- Start the new container and confirm that Caddy is using the expected CA.
Depending on the source system, you can use rsync or a compressed archive. For example:
rsync -a \
  /path/to/old/caddy-data/ \
  /path/to/new/caddy-data/
For this Compose setup, the destination is /volume1/docker/caddy/data/. The trailing slashes determine whether the command copies a directory’s contents or the directory itself. When moving from a native Linux service to Docker, confirm that files land at the expected relative path inside /data. Do not assume all installations use the same paths.
Option B: Create a new internal CA
If you do not need to preserve the old CA, the new Caddy instance can create one. You will then need to distribute and trust its root certificate on each client device that needs access.
The root certificate is commonly found at this path inside Caddy’s data directory:
pki/authorities/local/root.crtWith the directory layout in this guide, the corresponding NAS path is generally:
/volume1/docker/caddy/data/caddy/pki/authorities/local/root.crtConfirm the actual location for your installation. You can search the running container with:
sudo docker exec caddy \
  find /data -name root.crt
Distribute the public root certificate securely. Never distribute the root private key.
Install the certificate on client devices
Install the root CA certificate in the appropriate trust store on each client. Windows uses the Trusted Root Certification Authorities store; macOS uses Keychain; and Linux distributions provide their own system trust-store process. On iOS and iPadOS, installing a certificate profile may also require enabling full trust for the root certificate.
Verify the certificate’s source and integrity before trusting it. A private root CA can issue certificates for other names, so adding it to a device’s trust store is a meaningful security decision.
8. Validate the Caddy configuration
Validate the transferred Caddyfile before relying on the new proxy:
sudo docker exec caddy \
  caddy validate \
  --config /etc/caddy/Caddyfile \
  --adapter caddyfile
If validation fails, check the error for invalid directive syntax, missing braces, an incorrect backend URL scheme, unsupported transport options, missing certificate files, or settings that do not match the installed Caddy version. Validation checks whether Caddy can parse and load the configuration. It does not prove that a backend is reachable, so you still need to test the network and each application.
After editing a valid Caddyfile, reload Caddy without recreating the container:
sudo docker exec -w /etc/caddy caddy \
  caddy reload
9. Test Caddy before changing DNS
Test the NAS-hosted Caddy instance before redirecting normal client traffic. The old proxy can remain active while the new one runs, and DNS can continue pointing to the old address during testing.
Use curl’s --resolve option to send a request to the NAS while keeping the intended hostname for HTTPS:
curl --resolve \
  automation.example.test:443:192.0.2.50 \
  https://automation.example.test
In this example, 192.0.2.50 is the new address of Caddy on the NAS. If the test machine already trusts the Caddy root CA, curl should verify the certificate. Otherwise, specify the appropriate CA certificate:
curl --cacert ./root.crt \
  --resolve automation.example.test:443:192.0.2.50 \
  https://automation.example.test
Using curl -k can help with limited diagnostics, but it bypasses certificate verification and does not confirm that HTTPS trust is configured correctly.
Test each hostname. Check applications that use WebSockets, redirects, authentication cookies, or absolute URLs. Caddy supports WebSocket proxying, but application-specific origin restrictions or allowed-host settings may still need changes.
10. Update local DNS
When the new proxy works, update the local DNS records. Before the move, they may point to the old Caddy address:
proxmox.example.test    -> 192.0.2.60
automation.example.test -> 192.0.2.60
dashboard.example.test  -> 192.0.2.60
After the cutover, point the hostnames to the NAS-hosted proxy:
proxmox.example.test    -> 192.0.2.50
automation.example.test -> 192.0.2.50
dashboard.example.test  -> 192.0.2.50
The backend addresses in the Caddyfile usually stay the same. Moving the proxy does not move the applications.
Update records in the DNS service your clients actually use. Common choices include Pi-hole local DNS, Technitium DNS Server, AdGuard Home rewrites, and router-hosted DNS. If the network has multiple DNS servers, keep the relevant records consistent across them.
Check a client’s DNS response with either command:
nslookup automation.example.test
dig automation.example.test
The result should be the new Caddy address. If a client still returns the old address, check its DNS settings, cached records, resolver configuration, and record TTL.
Make the DNS change only after validating and testing the new instance. For larger environments, lowering record TTLs ahead of time can shorten the transition period.
11. Verify every application after cutover
After changing DNS, test each service through its usual hostname. A running container alone does not confirm that the migration is complete. Check that:
- Every hostname resolves to the new Caddy address.
- Browsers trust the HTTPS certificates and the certificates match the requested hostnames.
- Caddy can connect to each configured backend.
- Each application’s important functions work, not just its landing page.
- Login, logout, and session handling behave normally.
- WebSocket-based tools and real-time dashboards work.
- Redirects do not send users to an IP address, old hostname, or incorrect port.
- The Proxmox interface and NAS-hosted services are reachable through their expected hostnames.
Once clients are using the new proxy, stop the old Proxmox-hosted Caddy instance and test again. This confirms that traffic no longer depends on the old proxy.
12. Stop the old Caddy instance
After verifying the NAS deployment, stop the original Caddy service. For a native systemd installation:
sudo systemctl stop caddy
sudo systemctl disable caddy
For a Docker deployment, use the commands for its Compose project or container manager. For example:
docker compose stop caddyKeep the old configuration and data as a backup until the new deployment has run reliably and your rollback window has passed. Stopping the old instance also reduces the chance of accidentally editing the wrong Caddyfile.
13. Confirm automatic startup after a NAS reboot
The Compose example uses restart: unless-stopped, but the NAS must also start its container runtime and project correctly. Check the project in Synology Container Manager. During a suitable maintenance window, perform a controlled reboot and verify that the container starts:
sudo docker ps
sudo docker logs --tail=100 caddy
Then test the HTTPS hostnames again. A started container does not guarantee that every application is reachable. Network initialization, DNS availability, persistent storage, and backend startup timing can all affect access.
Common migration problems
Caddy cannot bind to port 443
Another NAS service may already be listening on HTTPS port 443. Check the listener, identify its owner, and review the service configuration:
sudo ss -lntp | grep ':443'Do not stop a system service without understanding its role. If DSM or another essential application needs the port, consider a dedicated IP or another supported network arrangement.
Browsers show certificate warnings
The new installation may have generated a different internal CA. Compare the old and new root certificates. If you intended to preserve the old CA, confirm that the correct data directory was copied and mounted. If the new CA is intentional, install and trust its root certificate on the required client devices. Do not treat browser certificate warnings as a permanent workaround.
A hostname resolves but returns 502 Bad Gateway
Caddy may be unable to reach the upstream application. Check the backend address and port, confirm that the application is running, and use the correct HTTP or HTTPS scheme. Also check that the NAS can reach the backend, firewalls allow the traffic, and the application listens on an interface reachable from the NAS. If the backend uses HTTPS, configure upstream certificate verification appropriately.
An application listening only on 127.0.0.1 on another server generally cannot be reached through that server’s LAN address.
An application redirects to an IP address
The application’s external URL, trusted-proxy settings, or allowed-host list may still reference a different address. Review the application’s documentation. Some services require an external URL to be configured; others rely on forwarded headers that Caddy normally supplies.
WebSocket connections fail
The application may reject the external hostname because of origin restrictions, or the request may be affected by an incorrect scheme or another network setting. Caddy’s reverse_proxy directive generally handles WebSocket upgrades without extra directives. Check browser developer tools and both Caddy and backend logs before adding configuration.
DNS still returns the old proxy address
The client may have a stale DNS cache or be using a different resolver than expected. Check the authoritative local DNS response, router DHCP settings, manually configured DNS, and encrypted DNS settings on the client.
Caddy works until the container is recreated
Configuration or certificate data may have been stored only in the container’s writable layer. Confirm that persistent mounts exist for /etc/caddy, /data, and /config. The data directory must survive restarts and image upgrades.
NAS-hosted services fail while other backends work
A service reachable from the NAS host through localhost is not necessarily reachable through localhost inside the Caddy container. Within a container, 127.0.0.1 refers to that container’s own network namespace. Use a reachable host address, a shared container network, or another supported connection method.
Keep the new deployment secure
Moving Caddy to a NAS does not replace other security controls.
Keep administrative interfaces private
HTTPS protects the connection, but it does not replace authentication or network access controls. Avoid exposing Proxmox, DSM administration, or other management dashboards directly to the public internet. Use suitable LAN restrictions, VPN access, access policies, and application-level authentication.
Protect Caddy’s private keys
The Caddy data directory contains sensitive cryptographic files. Restrict access to administrators and the container processes that need it. Do not put CA private keys in public repositories, screenshots, support requests, or publicly shared backups.
Back up persistent data
Keep recoverable backups of at least the Caddyfile, Compose file, data directory, and configuration state. Protect the backup destination and test recovery. For larger deployments, record DNS entries and NAS-specific port assignments as well.
Update the container carefully
Review Caddy releases and security updates periodically. A Compose update commonly uses:
sudo docker compose pull
sudo docker compose up -d
Back up the configuration and persistent data first. Pinning a tested image version gives you more control than pulling the newest image without review. After an update, validate the configuration and test critical hostnames.
Docker or a native Caddy installation?
On Synology systems that support Container Manager, Docker is a practical option. It keeps Caddy separate from much of the underlying operating-system configuration and makes the deployment repeatable. Bind mounts and Compose also make the configuration and data easier to preserve or move.
A native installation can work in other Linux environments. On Synology, it may depend more heavily on DSM behavior, package availability, and update procedures. Choose the method that fits your NAS model, network requirements, and administration preferences.
What changes after migration?
| Component | After migration |
|---|---|
| Caddy runtime | Moves from the Proxmox environment to the NAS. |
| Caddyfile | Copied and adapted to the NAS deployment. |
| Backend applications | Remain on their existing hosts. |
| Backend IP addresses | Usually remain unchanged. |
| Local application URLs | Can remain unchanged. |
| DNS records | Updated to point to the new Caddy endpoint. |
| Internal HTTPS | Preserved by migrating the CA data or configuring trust for a new CA. |
| Proxmox | Continues to host its existing VMs and containers. |
| Synology NAS | Takes responsibility for reverse proxy availability. |
The routing layer moves to a different machine while the application infrastructure stays in place. That is why the migration can preserve the hostnames users already know.
Migration checklist
- Identify the old Caddy deployment, Caddyfile, and data directory.
- Back up the configuration and sensitive certificate data.
- Confirm Synology supports the chosen container deployment.
- Check port 80 and 443 availability and plan container networking.
- Create persistent directories and deploy Caddy with Compose.
- Transfer the Caddyfile and, if needed, the existing CA data.
- Validate the configuration and test each hostname against the NAS address.
- Update local DNS and test all applications, authentication, redirects, and WebSockets.
- Stop the old proxy only after the new one is working.
- Retain a rollback backup and verify automatic startup after a NAS reboot.
Conclusion
Moving Caddy from Proxmox to a Synology NAS separates the shared HTTPS entry point from the virtualization host. The backend applications can stay where they are, and their familiar hostnames can remain unchanged.
The migration involves backing up the existing deployment, preparing the NAS, checking port and network requirements, moving the Caddyfile and certificate data, validating the new proxy, and updating local DNS. Pay particular attention to Synology port conflicts, persistent storage, internal CA trust, and the DNS cutover. Test each application before retiring the old instance, and keep a rollback copy until the NAS deployment has proved reliable.